

 1-877-817-6687


A durable epoxy floor starts long before the first drop of resin hits the slab. It starts with the concrete underneath. Prepping your garage floor for epoxy is the step that decides whether the coating bonds for years or peels within months, and it is also the step most people underestimate. This guide walks the full prep sequence step by step: testing the slab, stripping old coatings, grinding to profile, handling cracks and joints, and cleaning up so the coating bonds for good.
A Reality Check Before You Prep
Let us be straight: this is hard work. It is dusty, physically demanding, and it requires the right tools and know-how to do correctly. Most homeowners dramatically underestimate how tough concrete prep really is.
The best decision you can make is to call a professional who does this every day. They have the equipment, the experience, and they’ll get it done right the first time.
Dave Glynn, VP, U.S. Saws
If you are dead set on doing it yourself, go in with your eyes open. This is not a simple weekend project. It takes real effort, patience, and attention to detail.
How to Prep a Garage Floor for Epoxy
Done right, prep follows a clear sequence. Here is the whole job at a glance, with the detail for each step below.
- Test the slab for moisture and assess its condition.
- Strip old sealers and coatings.
- Grind the concrete to an even profile.
- Chase and fill cracks, and clean out control joints.
- Vacuum the slab completely clean.
- Detail the corners and confirm the floor is clean and dry.
Step 1: Test the Slab for Moisture and Assess Its Condition
Before you spend a day grinding, walk the slab and note what you are dealing with: cracks, old coatings, sealers, oil stains, and low spots. Then test for moisture, because this is the step that quietly ruins finished floors. Concrete wicks moisture up from below, and epoxy applied over a damp slab will bubble, blister, or delaminate no matter how well you profiled it.
The simplest field check is the plastic sheet test (ASTM D4263): tape an 18-inch square of clear plastic flat to the slab, seal all four edges, and leave it 16 to 24 hours. If condensation collects underneath or the concrete darkens, the slab is holding too much moisture to coat. For a numerical reading, use a calcium chloride test (ASTM F1869) or in-situ relative humidity probes (ASTM F2170).
Step 2: Strip Sealers and Old Coatings
Two problems tend to stand between you and bare, grindable concrete: stubborn sealers and old coatings.
Stubborn sealers, like curing compounds, form a tough acrylic layer on the surface. For sealers and tough surface layers, reach for the CW7TR12SLTB Turbo Cup Wheel.
Old coatings vary wildly in how hard they are to remove:
- H&C Deck Stain is very tenacious and difficult to grind. It requires soft-bond diamonds and patience. Throwing a little wet sand on the surface during grinding or shot blasting sometimes helps.
- DIY epoxy systems are usually easier to remove, since they are often already failing.
- Flake floors are tougher, but they typically come up with polycrystalline diamond (PCD) tools.
Step 3: Grind the Concrete to Profile
Now open the surface. The goal is to remove the top layer of concrete, open up the tiny surface capillaries, and create a rough profile. That profile dramatically increases surface area, which lets the new coating penetrate the slab and form a strong mechanical bond. Skip it, or do it halfway, and the coating has nothing to grab.
This is also why grinding beats the shortcuts. Acid etching and pressure washing look easier, but neither is a real substitute, and both can create new problems:
Never pressure wash or acid etch the floor. Both introduce moisture into the slab and leave contaminants behind that will sabotage your coating’s bond.
Dave Glynn, VP, U.S. Saws
Grinding to profile takes real tooling, not sandpaper and a shop broom:
- A medium planetary grinder, or a rental single or double disc grinder
- 30/40 grit trapezoid diamonds to start (DT2-B30M)
- Heavier grits and PCD diamonds for coating removal (DTB-2QR-R)
- A U.S. Saws 7″ hand grinder with dust shroud for edges and corners (SX60006PP-G2)
The planetary or disc grinder handles the open floor. The hand grinder handles everything the big machine cannot reach, which is where most of the detail work lives.
Step 4: Chase Cracks and Clean Out Joints
Random cracks need to be routed out and filled before you coat. Skip this, and those cracks will telegraph right through your brand-new floor. This is where the right saws matter.
For random cracks: the 5″ hand-held crack chaser.
The U.S. Saws 5″ Hand-Held Crack Chaser (SX55010) is built for exactly this. It is a lightweight, handheld saw made for chasing out cracks before filling, and it works on both horizontal and vertical surfaces. Powered by a 13.5 amp Metabo variable-speed grinder, it accepts 4″, 4.5″, or 5″ dry diamond blades and cuts up to 1-1/4″ deep. The full metal blade guard and polycarbonate dust shroud connect to a vacuum (150+ CFM) for nearly dust-free operation, which matters when you are working inside an attached garage. It also cleans out joints in tight spots where a bigger saw will not fit.
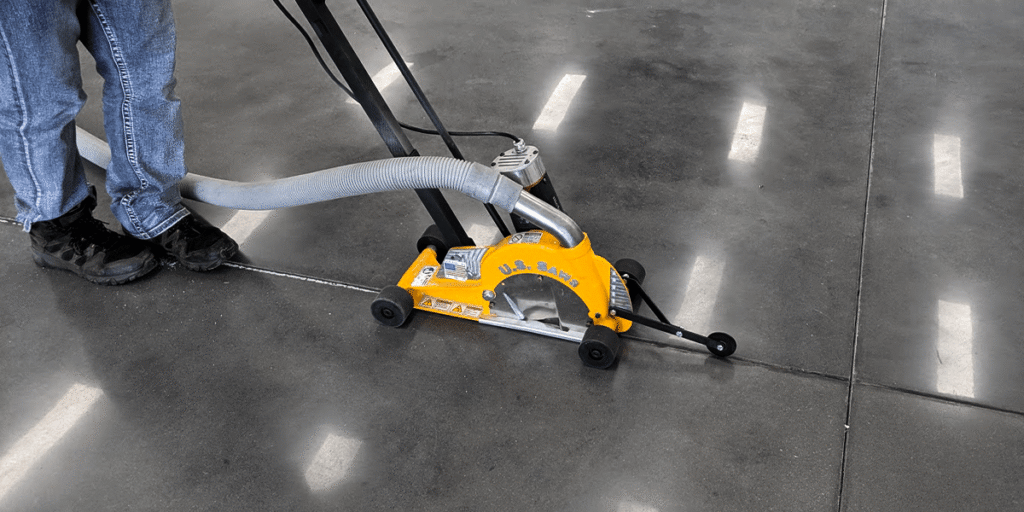
For control joints: the Mark-IV Dust Buggy.
For control joints, step up to the Mark-IV Dust Buggy (SX13800), a walk-behind joint clean-out saw professionals rely on. It cleans out control joints, removes old joint filler, and makes straight, accurate cuts up to 2″ deep with an 8″ blade. The blade guard covers 98% of the blade for strong dust control while still letting you see your cut line, and the up-cut blade rotation pulls debris out of the joint as you go. A solid aluminum chassis, backed by a lifetime warranty, keeps the machine stable for dead-straight cuts, and the adjustable, rotating handle lets you work close to walls. Dealing with old polyurea joint filler? Pair it with a Tiger Tooth blade.
That dust control is not optional, and it is not just about a cleaner garage:
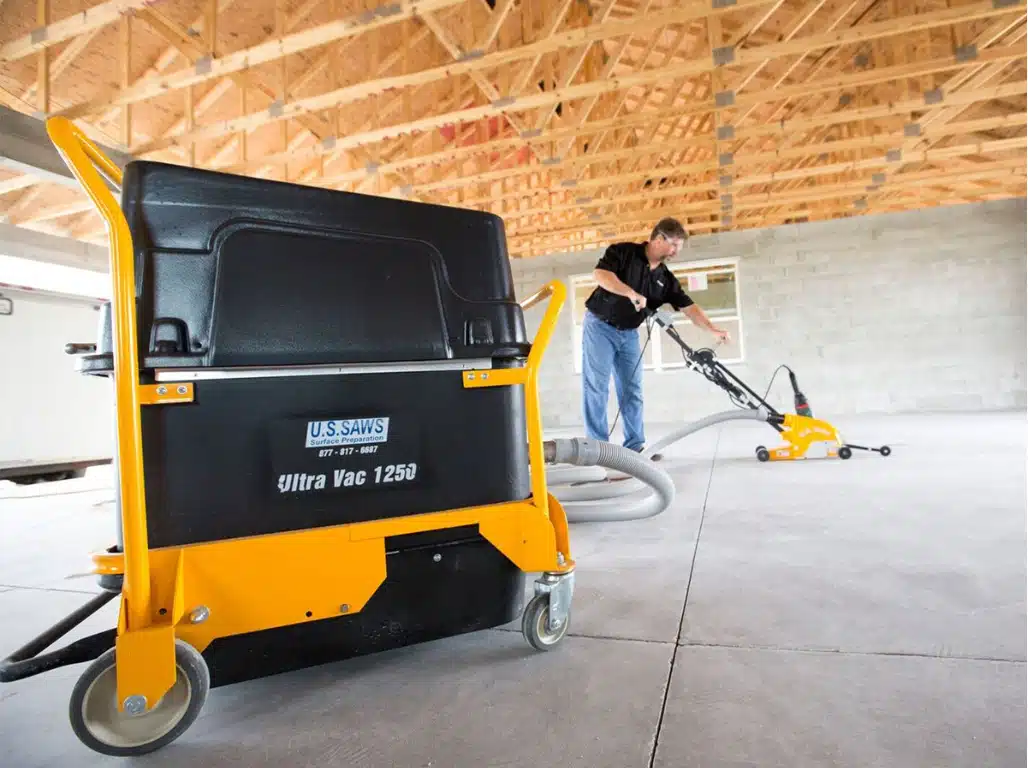
OSHA requires 25 CFM of vacuum per inch of blade diameter—so with an 8″ blade, you need at least 200 CFM. A big-box wet/dry vac won’t cut it.
Amir Omary, U.S. Saws Surface Prep Sales & Technical Support
Cutting concrete releases respirable crystalline silica, and OSHA’s respirable crystalline silica standard for construction (29 CFR 1926.1153) spells out the dust controls required for handheld saws and grinders, including the vacuum and shroud setup described above. Getting the airflow right keeps you compliant and keeps the dust out of your lungs.
Step 5: Vacuum the Slab Clean
The floor has to be impeccably clean before any coating goes down. Any dust or debris left behind becomes a weak point where the coating simply cannot bond to the concrete.
After grinding or shot blasting, vacuum the entire slab thoroughly. Do not just sweep it. A broom pushes fine dust around instead of removing it.
The right attachment makes this far faster. The U.S. Saws 20″ Floor Wand (SX73424) connects to your dust collection vacuum and lets you clean the slab in wide 20-inch passes instead of fumbling with a narrow shop vac nozzle. Built from solid aluminum, it holds up to jobsite abuse and glides flat across the concrete, pulling up the fine grinding dust that settles into the surface profile you just worked to create.
Step 6: Detail the Corners and Do a Final Check
Corners need extra attention with the hand grinder. Take your time. These are the spots most people rush, and it shows in the finished floor.
Before you open the first kit of epoxy, do a final pass. The slab should be profiled, crack-free, dry, and vacuumed clean. If your moisture test from Step 1 came back damp, stop and fix that first. A flawless prep job cannot survive a wet slab.
The Bottom Line on Garage Floor Epoxy Prep
Proper concrete preparation is non-negotiable. Do it right, with quality diamond tooling, and the coating will last for years. Dave Glynn is blunt about the alternative:
Sandpaper and a floor buffer will not work. Don’t even attempt this job if you aren’t willing to do it right—you’ll just end up paying a professional to remove it later.
Dave Glynn, VP, U.S. Saws