Every warehouse, distribution center, and manufacturing facility has them: control joints sliced into the concrete slab in a grid pattern, designed to manage where the concrete cracks as it shrinks and settles. The theory is simple. The execution is where most operations fail.
Walk into any high-traffic warehouse six months after the floor was poured, and you’ll see the evidence. Joint edges spalling under forklift traffic. Filler material crumbling out in chunks. Random cracks spiderwebbing across the slab where the joints couldn’t do their job. The problem isn’t the concrete. It’s the joint preparation, or the lack of it.
In this blog, we break down why control joints fail, what proper joint cleanout and maintenance actually requires, and how cleanout saws and other equipment are designed specifically for contractors who need to get it right the first time.
Why Control Joints Exist in the First Place
Control joints aren’t structural. They’re insurance. When concrete cures and shrinks, it’s going to crack. The question is whether it cracks where you want it to or randomly across the slab in patterns you can’t predict or control.
A control joint is a deliberately weakened line in the concrete. You’re creating a grid of individual floating slabs, each one free to move slightly without transferring stress to the adjacent section. Done correctly, the slab cracks along the joint, not through the middle of a traffic lane.
The problem is that even perfectly cut joints will fail over time if they’re not properly prepared and filled. And in high-traffic industrial environments, “over time” can mean months, not years.
The Real Killers: Traffic, Movement, and Poor Prep
Forklifts are the silent assassin of concrete joints. Steel wheels, heavy loads, repetitive traffic in the same lanes, eight hours a day, five days a week. The joint looks fine initially. Then the edges start chipping. The filler separates. The slab moves slightly with temperature changes, and suddenly the concrete is failing on both sides of the joint.
If the subgrade is soft or uneven, the problem accelerates. Every pass of a loaded forklift becomes a small seismic event. The joint doesn’t just wear; it collapses.
But the biggest failure point isn’t the traffic. It’s the preparation before the filler goes in. Smooth, shiny concrete walls inside the joint. Dust and debris left behind from the saw cut. Old laitance or uncured concrete leaching into the joint. All of it acts as a bond breaker. The filler has nothing to grab onto, so it doesn’t. It just sits there until the first forklift wheel pops it out.
Preventative Maintenance: The Right Way to Prep a Concrete Joint
Most contractors wait until the joint fails, then try to patch it. That’s backwards. The time to address a control joint is immediately after the early-entry saw cuts are made, when the building is new and the concrete is still clean.
Here’s the process for a 100,000-square-foot tilt-wall building with heavy forklift traffic:
Step 1: Re-Cut the Joint with a Diamond Blade
Take a joint cleanout saw with a diamond blade and run it down the full length of the joint. The blade needs to reach nearly to the bottom of the joint, and the outside edges of the blade must contact the sidewalls. You’re not deepening the cut. You’re cleaning it.
What this does:
- Removes uncured concrete that has leached into the sidewalls
- Creates a rough, profiled surface for the filler to bond to
- Clears dust and debris that would otherwise act as a bond breaker
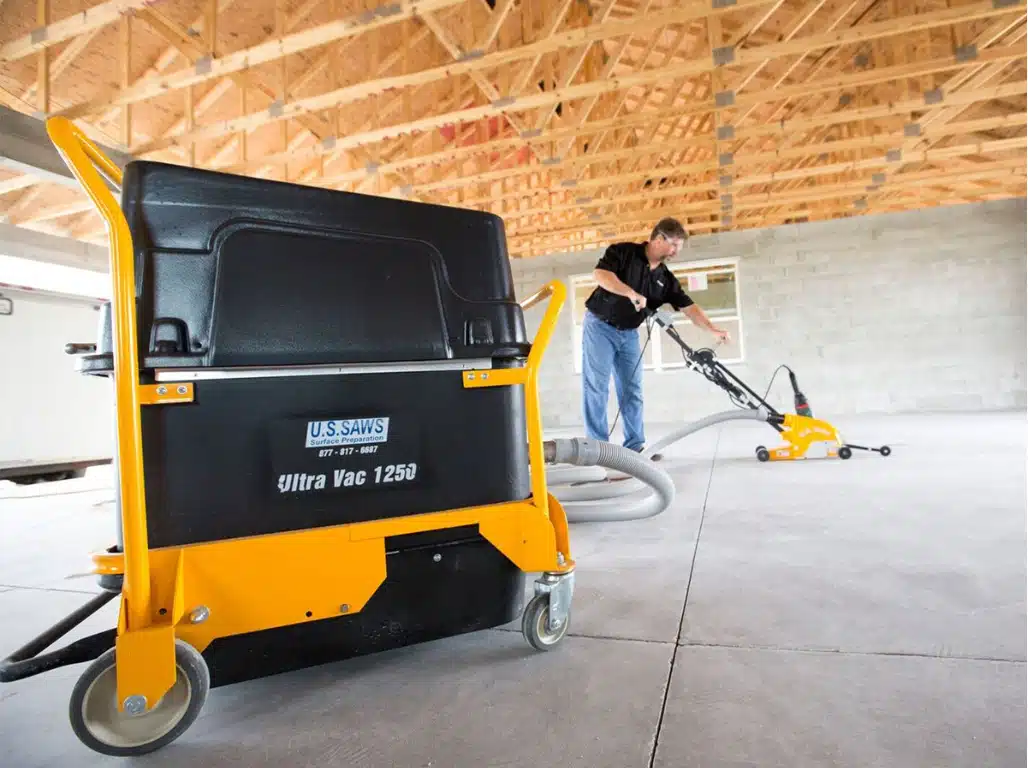
This has to be done dry. Water leaves moisture behind, and moisture kills adhesion. A vacuum-equipped saw captures the dust at the source, keeping the work area compliant with OSHA silica regulations and the joint clean for filling.
Step 2: Vacuum the Joint (Again)
Even with a dust collection port on the saw, there’s always residual material. Hit the joint with a shop vacuum to pull out anything the saw missed. The goal is a clean, dry, textured surface with no contamination.
Step 3: Fill the Concrete Joint to Full Depth
For interior joints with heavy forklift traffic, skip the backer rod. It’s appropriate for light foot traffic or pneumatic-wheel applications, but under steel wheels and heavy loads, you need full-depth support.
Use a two-component epoxy or polyurea with a Shore hardness between 80 and 90. Too soft and it compresses under load. Too hard and it cracks when the slab flexes. This range gives you the balance between flexibility and load-bearing capacity.
Apply the filler with a two-component pump. A machine like the U.S. Saws one-man pump mixes Part A and Part B in a static mixer and deposits the material directly into the joint. No guesswork, no mixing errors, no air pockets.
Leave the filler slightly high. Once it’s cured enough that you can touch it without leaving a fingerprint, run a razor scraper over it to cut it flush with the slab.
That’s it. It’s done.
Why Concrete Joints Still Fail (Even When Done Right)
Concrete moves. Temperature changes cause expansion and contraction. The subgrade shifts. Heavy traffic creates compressive and tensile forces the slab wasn’t designed to handle long-term. Control joints are not a permanent solution. They’re a maintenance solution, and they have a service life.
In high-traffic areas, especially on unstable subgrades, joints will eventually fail. The filler may separate from the sidewalls. The edges may spall. The joint may open wider than the original cut. You should get several years from a properly prepared and filled joint, often ten years or more. But in the heaviest traffic lanes, you may need to address the joint sooner.
The variable that determines lifespan more than anything else is the original preparation. A joint prepped correctly will outlast a poorly prepped joint by years, sometimes decades. A joint that was never cleaned, never profiled, and filled over dusty, contaminated concrete will fail in months.
Equipment Built for Joint Cleanout
Most contractors approach joint cleanout with whatever they have on hand: an angle grinder, a shop vacuum, improvised jigs to keep the cut straight. It works, but it’s slow, inconsistent, and wears out equipment that wasn’t designed for the task.
The right tool is a purpose-built joint cleanout saw. Here’s what the market leader offers.
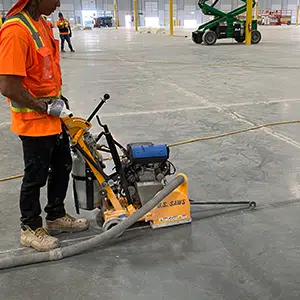
JS-160: The Standard for Interior Work
The JS-160 is a propane-powered joint cleanout saw with a 16-horsepower twin-cylinder engine. It uses an 8-inch or 10-inch diamond blade, most commonly 1/8-inch or 1/4-inch wide, spinning in an up-cut rotation that ejects debris into a dust collection port.
Key features:
- Propane power for indoor use (no exhaust fumes)
- Offset wheel pattern so the saw doesn’t roll over the joint
- Electric start
- Quick-release plunge with locked depth control
- Front and rear pointers for accurate tracking
- Dust collection port for OSHA compliance
This is the workhorse for large-scale interior projects: warehouses, distribution centers, manufacturing facilities. It’s been in production for nearly 30 years because it works.
JS-131: Gas-Powered for Outdoor Projects
The JS-131 is the JS-160’s predecessor, powered by a 13-horsepower single-cylinder Honda gas engine. It’s primarily used for outdoor applications: parking lots, parking garages, runways, and partially enclosed structures where gas-powered equipment is permitted.
For outdoor joints with urethane filler over a backer rod, the process is straightforward. Run the JS-131 with a thin blade down one edge of the joint, then turn around and cut the other edge. The backer rod and polyurethane lift out by hand.
The JS-160 has largely replaced the JS-131 for contractors working indoors, but the 131 remains the go-to tool for outdoor concrete maintenance.
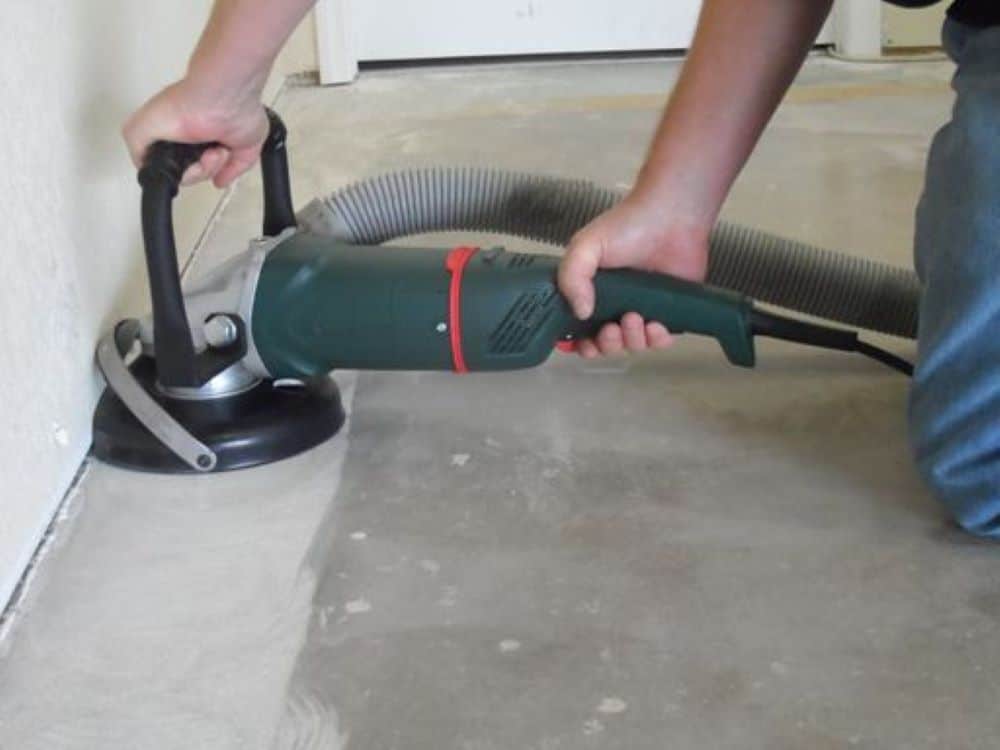
Mark IV: Precision for Small Jobs and Tight Spaces
The Mark IV is a right-angle grinder mounted to a chassis. It’s compact, accurate, and runs on 110-volt power. Where the JS-160 and JS-131 handle high-
volume production work, the Mark IV handles detail work: small joints, confined spaces, areas the larger saws can’t reach.
It’s also the tool of choice for residential or light commercial work where tens of thousands of linear feet of joint cleanout isn’t required, but precision and control are.
Removing Old Joint Filler: The Tiger Tooth Blade
Eventually, you’ll need to remove old filler and replace it. Big-box retail stores do this routinely. They don’t tolerate cracked floors, so they skim off the top quarter-inch to half-inch of old joint filler and place new material on top.
All three U.S. Saws joint cleanout machines (JS-160, JS-131, Mark IV) can remove old epoxy or polyurea. For epoxy, a standard diamond blade works. For polyurea, it doesn’t. Polyurea is flexible and heat-resistant, which causes standard diamond blades to load up and lose cutting efficiency.
The solution is the U.S. Saws Tiger Tooth blade, available in multiple sizes and thicknesses. The larger diamond grit tears through polyurea without loading the blade. For the JS-160, the blue Tiger Tooth blade at 0.187 inches thick is the standard choice.
The process is simple: line up the saw with the joint, start the machine, plunge the blade to the desired depth, and push straight down the joint. The front and rear pointers keep the cut accurate. Dust collection keeps the work area clean and compliant.
What “Temporary” Actually Means
Technically, all joint fillers are temporary. Concrete moves, traffic wears surfaces, and no material lasts forever under industrial conditions. But “temporary” doesn’t mean disposable. A properly prepped and filled joint should deliver years of service, often a decade or more, before requiring maintenance.
The key is doing it right the first time. Clean the joint. Profile the sidewalls. Fill to full depth with the right material. Cut it flush. That’s the difference between a joint that lasts ten years and a joint that fails in six months.
For high-traffic facilities, a proactive maintenance schedule makes sense. Walk the floor quarterly. Look for filler separation, edge spalling, or vertical movement when forklifts cross the joint. Catch problems early, and the repair is minor. Wait until the forklift is bouncing over a failed joint, and you’re chasing cracks, patching chunks, and losing productivity to downtime.
Why Cleanout Saws Matters
U.S. Saws is a second-generation, family-owned business that manufactures all joint cleanout saws in the USA. The JS-160, JS-131, and Mark IV are built in Southern California by a dedicated team with a full machine shop and assembly line. Customer service operates from 8:00 AM Eastern to 5:00 PM Pacific, with locations in Florida and California.
The JS-160 has been in production for nearly 30 years not because it’s the cheapest option, but because it’s the most reliable. Contractors who run these machines on job sites know the difference between equipment designed for the task and equipment adapted to it.
For joint cleanout, joint maintenance, and filler removal, purpose-built tools deliver consistent results. Everything else is improvisation.
The Standard for Joint Maintenance
Control joints are designed to crack where you want them to. Whether they actually do that depends on preparation. Properly cleaned, profiled, and filled joints last years. Poorly prepped joints fail in months.
The equipment exists to do the job right. The process isn’t complicated. But it requires the right tools, the right materials, and a commitment to doing preventative maintenance instead of waiting for failure.
That’s the difference between a floor that works and a floor that costs you time, money, and productivity every time a forklift crosses a joint.