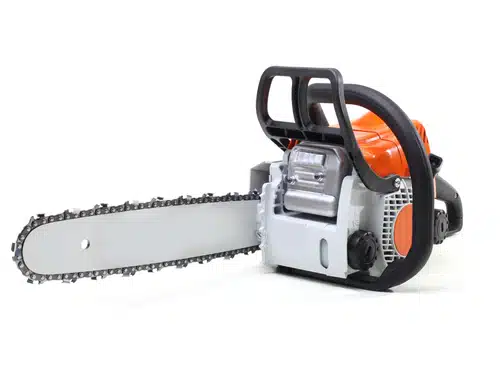
Knowing how tight a chain saw chain should be is essential for both performance and personal safety. Great equipment is only effective when it’s used and maintained properly, and your chain saw is no exception.
All chains are susceptible to stretching and sagging over time, and the amount of stretch depends on the type of chain saw and the material you’re cutting. Tension that is too loose or too tight brings its own risks. To avoid problems, check your chain saw before starting a project and a few times during operation to make sure it’s operating optimally.
How to Tell if Your Chain Saw Has the Proper Tension?
As with most maintenance, your chain saw requires balance. The right chain tension depends on the job. Concrete cutting and ductile iron cutting chain saws typically run with a slightly looser tension than wood cutting models.
General rule: The chain saw chain should sit snugly along the guide bar with a little slack. The bar links should lift slightly when pulled but remain engaged in the bar nose and groove.
Testing the tension is simple:
- Pull test: Gently pull the chain away from the guide bar to see if the links remain engaged. They will want to lift up slightly, but not enough to become dislodged from the guide bar.
- Rotation test: With gloves, rotate the chain around the guide bar by hand. A properly tensioned chain moves smoothly with little force.
If the chain sags or can come off the bar, tighten it before use according to your manufacturer’s owner manual. You also need to ensure the chain is not too tight. If there is no give to the chain when you pull up slightly, and it sits rigidly along the guide bar, the tension needs to be adjusted to loosen it up before use. In this instance, you should also consult the manufacturer’s manual to ensure you are properly tightening the chain. Always follow the manual for model‑specific steps.
The Danger of Running a Chain Saw with the Wrong Tension
Monitoring the tension of the chain is critical to extend the life of your chain saw, improve cutting performance, and protect your safety. Incorrect tension shortens the life of your chain saw and increases the risk of accidents. Understanding the consequences of incorrect tension is as important as knowing how to adjust it. Whether the chain is too loose or too tight, improper tension can lead to safety hazards, costly repairs, and poor cutting results.
Risks of a loose chain:
- Loose chains can cause warps in the guide bar, which then may lead to a string of other rapidly worn parts.
- If the chain is too loose, you run the risk of higher risk of chain derailment (chain coming off the bar), which can cause severe injury, which may cause severe injury to the user, including a loss of limbs or digits or even a severe cut to the face.
- Kickback is also a serious issue with loosely tensioned chain saw chains which can cause severe injuries.
Risks of an overtight chain:
- Excessive tension can strain the clutch, bearings, and motor, all of which are vital to operating the chain saw
- Chains that are too tight may cause the chain saw to heat up, which is damaging to other components and may even create a fire hazard.
- An overtight chain can cause a shorter lifespan for the chain and guide bar
How to Adjust Chain Saw Chain Tension
Each chain saw from U.S.SAWS comes complete with a manual that outlines the proper method to test and adjust chain saw chain tension and to properly maintain your chain saw to ensure the longevity and safety of your tool.
The tips presented below are general instructions only and not meant to replace your particular owner manual instructions.
-
- Always turn the saw off and tension the chain only when it’s cool. Wear gloves and follow the manufacturer’s safety guidance.
- Locate the adjustment points. These are typically on the side cover or the front of the saw near the guide bar. Some models have a built‑in adjustment in a side cover release knob.
- Loosen the guide bar nuts so the bar can move during adjustment.
- Turn the tension screw clockwise to tighten or counterclockwise to loosen. Hold the bar nose up while adjusting and keep it raised until the nuts are re‑tightened.
- Adjust for bar type:
- Sprocket-nose bars: After standard adjustment, give the tensioner an additional quarter to half turn so the lowest tie straps and cutters contact the bar rail firmly.
- Solid-nose bars: Stop when the drive links are fully seated and all tie straps lightly touch the guide bar.
-
- Check the fit. There should be a small gap under the chain, and it should move freely yet feel snug.
- Test the tension:
- Rotation test: Pull the chain along the top of the bar toward the nose. It should move smoothly with light resistance.
- Snap test: Pull the chain down on the underside of the bar so one or two drive links lift out of the groove, then release. The chain should snap back into place immediately.
Keep Your Chain Saw in Peak Condition
Knowing how tight a chain saw chain should be and maintaining proper chain tension is only one part of keeping your chain saw performing safely and efficiently. Long-term care of your chainsaw ensures your equipment lasts longer, cuts cleaner, and stays safer to use.
When you understand how tight a chainsaw chain should be and treat tension checks as part of a broader maintenance plan, you’ll protect both your investment and your safety. Over time, these simple habits will help you avoid costly repairs, extend your chain’s lifespan, and ensure every cut is as smooth and efficient as the first